Entries Tagged 'Arts and Crafts' ↓
Pumpkin Tools
October 28th, 2009 — Arts and Crafts, Halloween
Light up Your Halloween Pumpkins
October 28th, 2009 — Arts and Crafts, Halloween
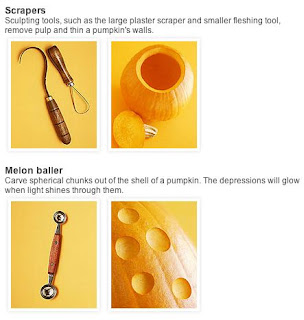
Turn a pumpkin on its side, and use a knife to carve out a circular opening in the bottom. Make the opening large enough so your hand can fit comfortably through it. Use a spoon to remove the flesh and seeds. With a serrated loop tool, scrape away the pumpkin’s inner wall until it’s about 1/4 inch thick. Turn the pumpkin right side up. Drill holes using a 1/4-inch bit; use tape as a guide for a uniform pattern, or make randomly spaced holes. Insert a string of lights through the bottom, and place one bulb in each hole, pushing the bulbs through so they protrude slightly. Tuck the remaining lights into the pumpkin, and turn the pumpkin right side up with the light string’s plug running out from the bottom. – Martha Stewart


Pumpkin Snake
October 28th, 2009 — Arts and Crafts, Halloween
Using the utility saw, cut a hole in the top and bottom of the first “body” pumpkin. One hole should be about fist-size, in order for you to reach your hand in and remove the seeds, and the other just big enough for a string of lights to pass through.
Hollow out the insides of the pumpkin with the scoop.
Drill a series of holes into the sides of the pumpkin, varying the size of the bits. When drilling the larger holes, you don’t have to puncture all the way through the flesh; the light will glow through partly drilled holes. Repeat with all pumpkins except for the head.
Set the pumpkin head on its side, so that the elongated shape can form the jaw of the snake. Draw a serpent face with long fangs around the stem of the pumpkin (which you should remove when you cut out the mouth), using a felt-tip marker. Cut out the eyes and mouth with the small saw. With a fine-tip utility knife, carve out other snake features, such as nostrils.
Once you have cleaned and drilled all your pumpkins, arrange them in a snaking line.
Starting with the head (which should be farthest from the house), pass the string of lights through the holes at each end of the pumpkins (the larger pumpkins may require two to three lights; the smaller pumpkins near the tail, just one). You may need an extension cord to reach an electrical outlet. – Martha Stewart
Halloween Treats: Halloween Haunted House Kit
October 27th, 2009 — Arts and Crafts, Halloween
Mothers Day Cards
May 3rd, 2009 — Arts and Crafts, Mothers Day


